Many of you may already know that my daughter goes to college in New Orleans. We live in New Jersey (in case you didn’t know). This distance presents some minor challenges, as you can imagine. We can’t easily load up the car and drive her to school like my parents did for me.
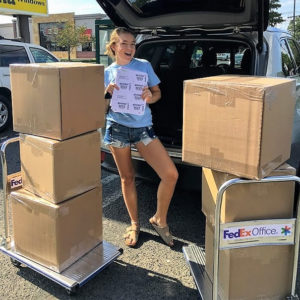
Her freshman year we packed and shipped six boxes for her dorm room. We were not alone. Given the increase in kids traveling from around the globe most college campuses have figured out how to handle the arrival of these boxes. FedEx to the rescue…

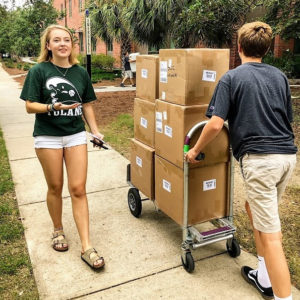
We arrived in NOLA on a hot and steamy August day to help her move-in. Imagine kids and parents lining up at large FedEx tractor trailers to pick up their boxes and haul them across campus.
We saw all sizes and shapes of boxes coming off these trucks – lots of them were completely crushed, taped haphazardly, and nearly open. Ours were in good condition, as expected.

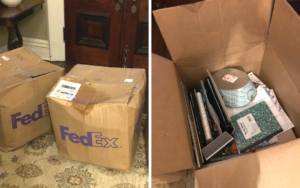
Fast forward to this Spring. With a study abroad lined up, she had to pack and ship ALL her possessions home. Impressively and without a car, she managed to mail a total of five very large, very heavy boxes home.
They arrived relatively intact, but like a bag of chips or a box of cereal – the contents settled during shipping. I was surprised to learn that despite being raised by a certified professional organizer, working for me over several summers, and having some of my DNA, she didn’t know some basic packing techniques.

Packing a box is not intuitive. I’ve had clients ask for tips. I’ve unpacked damages items due to poor packing. It is a skill to be learned, just like so many other things in life.
The Basics: The box should be tightly packed so when you shake it nothing moves or rattles. Boxes will be stacked fairly high in your moving truck and you want to avoid crushing.
- Select an appropriate box: People often try to make do with any size they can find. Big mistake. Boxes come in various sizes (S-M-L-XL) but also various weights: primarily, single or double walled construction. You may have noticed Heavy Duty boxes at The Home Depot. This double walled cardboard is used for heavier items. Not all items need to be packed in these heavy-duty boxes. Plus, these boxes are more expensive. Mix and match to keep your material costs down. Avoid re-using supermarket or liquor store boxes – they aren’t sturdy enough to withstand a move.
- Construct the Box: Fold two flaps in to meet in the center, then fold the other two flaps to meet in the center in the other direction- tape with packing tape down the center line. No need to go crazy with the tape. Think about your last Amazon box. How was it taped? Extra tape may be warranted if you are packing a somewhat heavy box but we see a lot of unnecessary taping.
Warning: Don’t do the over/under fold on the top or the bottom. This does not avoid the need for tape. In fact, it requires more tape and more time to break down your box later.
- Packing material: Don’t skip on packing material, especially for your breakables. Ideal packing material is clean packing paper. Use paper to fill spaces so they are not overly heavy. And, leave the styrofoam peanuts to the UPS guy who can neatly manage them.
PRO TIP: Avoid bubble wrap. It’s expensive, bulky, and requires more time and energy to wrap and unwrap. If you happen to have it, by all means, use it for small, fragile decorative items. Other nifty packing products like foam pockets just add more cost.
- Layer the bottom of the boxes with clean bunched up packing paper. Do the same when you have finished loading the box with your wrapped items. These layers cushion your items.
- Wrapping Technique: Wrap your breakable items in one or two pieces of packing paper. Place your items in the corner of the packing paper and fold and layer items as you roll toward the other side. You do not need to use tape on these items. Use plenty of paper to cushion between and around items. When your box starts to get heavy, even if not 100% full, it’s time to pack to the top with paper. This keeps items from shifting in the box and minimizes crushing when stacked in the truck. Both can lead to broken items.
PRO TIP: When packing pots and pans use dish towels, pot holders, and aprons to cushion between and around. These items need to be unpacked in the kitchen and are perfect for non-breakables.
PRO TIP: When packing super small items you may want to label it or mark it with a sharpie so it’s not accidentally discarded with other packing material. This has happened and it’s very disappointing.
6. Ziploc Bags: use for bathroom items, liquids, and other loose items to contain them in the moving box. The more organized you are when packing the easier the unpacking.
7. Use smaller boxes for heavier items, larger boxes for lighter items: Sounds simple but worth repeating. Boxes need to be moved from where they were packed onto the moving truck. Books are heavy – use many small boxes versus one large box – to keep the weight of the box around 40-50 pounds.
8. Final taping and labeling – close the top of the box just like the bottom and tape across the center when flaps meet. Avoid open gaps or bulging boxes. Label the top and all sides as shared in previous post.
Please let us know if you have any specific questions about packing your items. If you have a packing hack please share with us.


